How to Add an Addon Domain
An addon domain lets you host a completely separate website — with its own files, email addresses, and databases — under a single CyclebreezeHost hosting account. Unlike a subdomain, an addon domain has its own distinct domain name (for example, secondsite.com) and appears to visitors as an entirely independent website.
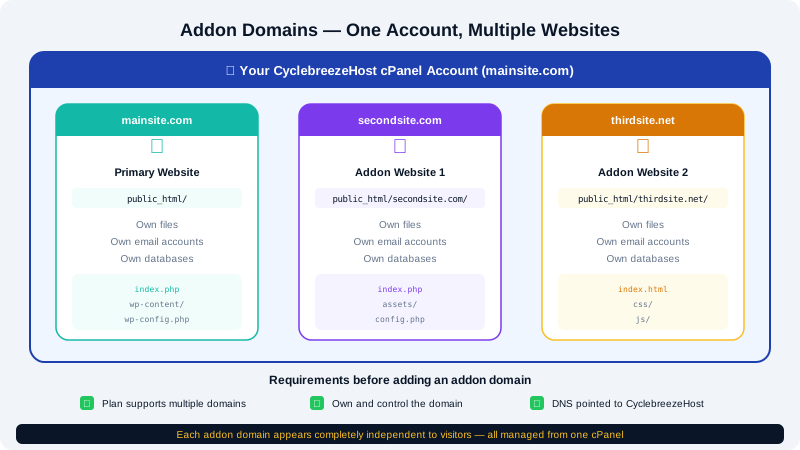
Before You Begin
To add an addon domain, you need:
- An active CyclebreezeHost hosting plan that supports multiple domains (check your plan details in the Client Area).
- A domain name that you own and control. The domain can be registered at CyclebreezeHost or at any third-party registrar.
- Access to that domain's DNS settings so you can point it to CyclebreezeHost's nameservers.
Step 1 — Point the Domain's DNS to CyclebreezeHost
If the domain is registered at CyclebreezeHost, this is handled automatically. If it is registered elsewhere, log in to that registrar and update the domain's nameservers to CyclebreezeHost's nameservers. You can find your account's nameservers on the Account Information page in cPanel or by opening a support ticket.
DNS changes can take up to 48 hours to propagate globally, though most updates resolve within a few hours.
Step 2 — Add the Domain in cPanel
- Log in to the Client Area at https://clients.cyclebreezehost.com and open cPanel.
- In the Domains section, click Addon Domains.
- In the New Domain Name field, enter the domain you want to add (for example,
secondsite.com). - The Subdomain and Document Root fields will auto-populate. The document root will be something like
public_html/secondsite.com— this is where the website's files will live. - Set a Password for the associated FTP account, or leave the FTP account unused if you prefer to manage files via File Manager.
- Click Add Domain.
cPanel will create the document root directory, configure the virtual host, and add the domain to your account.
Step 3 — Upload Your Website Files
Once the addon domain is created, navigate to its document root (for example, public_html/secondsite.com) using File Manager in cPanel or an FTP/SFTP client. Upload your site's files there. An index.html or index.php in that folder will be served as the homepage.
You can also install a CMS like WordPress using Softaculous:
- Open Softaculous Apps Installer in cPanel.
- Choose your application.
- Under Choose Installation URL, select your addon domain from the dropdown.
- Complete the wizard.
Step 4 — Set Up SSL
CyclebreezeHost's AutoSSL powered by Let's Encrypt will automatically detect your addon domain and issue a free SSL certificate, usually within a few hours of the domain resolving to your server. You can monitor certificate status under SSL/TLS Status in cPanel.
To force HTTPS once the certificate is active, add a redirect in your .htaccess file or use the Redirects tool in cPanel.
Managing Addon Domains
Return to Addon Domains in cPanel at any time to:
- View the document root and FTP details for each addon domain.
- Remove an addon domain by clicking Remove. This removes the domain configuration but does not delete the files in its document root — back up and remove those manually if you no longer need them.
Key Differences: Addon Domain vs. Subdomain vs. Parked Domain
| Feature | Addon Domain | Subdomain | Parked Domain |
|---|---|---|---|
| Own domain name | Yes | No | Yes |
| Independent website files | Yes | Yes | No (mirrors main site) |
| Own email addresses | Yes | No | No |
| Looks independent to visitors | Yes | Partially | Yes |
If you need help adding an addon domain or troubleshooting DNS propagation, contact CyclebreezeHost support at info@cyclebreezehost.com or open a ticket in the Client Area.