Branding WHM and cPanel for Your Business
One of the biggest advantages of reseller hosting is the ability to present a fully branded experience to your clients. CyclebreezeHost reseller accounts support white-labelling both WHM and cPanel, allowing you to replace default logos, company names, and contact details with your own. Your clients see your brand — not CyclebreezeHost.
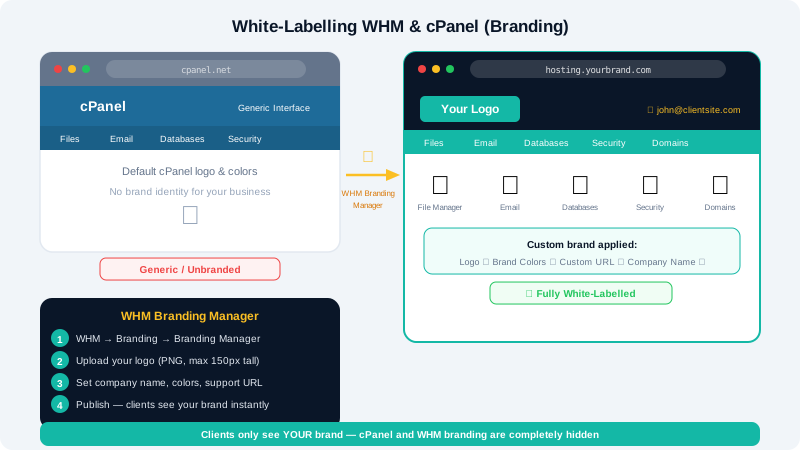
What You Can Brand
- The company name displayed throughout WHM and cPanel
- The logo shown in the top-left corner of both interfaces
- The support contact information (email, URL, phone) shown in cPanel's help section
- The favicon shown in browser tabs
- The cPanel style/theme presented to clients
Step 1 — Set Your Reseller Identity in WHM
- Log in to WHM at
https://yourserver:2087. - In the search bar, type
Basic cPanel & WHM Setupand click the result, or navigate to Server Configuration > Basic cPanel & WHM Setup. - Update the following fields:
- Company Name — Your business name (e.g.
Bright Hosting Ltd) - Company Contact Email — Your support email address
- Company Contact URL — Your website URL
- Company Name — Your business name (e.g.
- Click Save.
This name appears in outgoing emails, notifications, and some interface headers.
Step 2 — Upload a Custom Logo in WHM
WHM uses a separate branding tool to set logos for the WHM interface itself.
- In WHM, navigate to WHM > Branding (search for
Branding). - Under the Reseller Branding section, click Add Brand.
- Give your brand a name and upload your logo file.
- Recommended format: PNG with a transparent background
- Recommended dimensions: 200 × 60 px (landscape) or 60 × 60 px (square icon)
- Click Save.
- To make this the default brand, click Set as Default next to your new brand entry.
Step 3 — Brand the cPanel Interface Your Clients See
cPanel's branding is managed separately from WHM's branding.
- In WHM, search for
Modify cPanel Brandingor navigate to cPanel > Modify cPanel Branding. - Enter your Company Name and Company Logo URL (a publicly accessible URL to your logo image).
- Enter your Support Email and Support URL — these appear in the cPanel Help section and on error pages.
- Click Save.
Tip: Host your logo on your own website and use the full
https://URL. This ensures the logo always loads correctly, even if the client's domain is not yet active.
Step 4 — Set a cPanel Theme for New Accounts
You can control which cPanel theme is applied to accounts you create.
- When creating a new account (Account Functions > Create a New Account), choose the theme from the cPanel Theme dropdown.
- To change the theme for an existing account, go to Account Functions > Modify an Account, find the account, and change the cPanel Theme field.
The default theme (paper_lantern) provides a clean, modern interface your clients will find easy to use.
Step 5 — Customise the Favicon (Optional)
Replacing the default cPanel favicon with your own reinforces your brand in browser tabs.
- In WHM, go to Branding and open your brand entry.
- Upload a
favicon.icofile (16 × 16 px or 32 × 32 px). - Save the brand.
What You Cannot Change
As a reseller, there are a few areas of the interface that remain outside your control:
- Server-level configuration pages in WHM that are reserved for the root administrator
- The cPanel version number displayed in the footer
- Core security notices generated by cPanel itself
Testing Your Branding
After making changes, log out and log back into cPanel as one of your clients (or use the List Accounts > cPanel login shortcut in WHM) to confirm the logo, name, and contact details appear as expected.
For help with advanced branding customisation, contact CyclebreezeHost support 24/7 at info@cyclebreezehost.com or open a ticket at https://clients.cyclebreezehost.com.