Choosing and Customising a Template
Your template sets the visual foundation of your website — its layout, colour palette, and typography. CyclebreezeHost's Website Builder makes it straightforward to select a template that fits your purpose and then customise every detail to match your brand without touching any code.
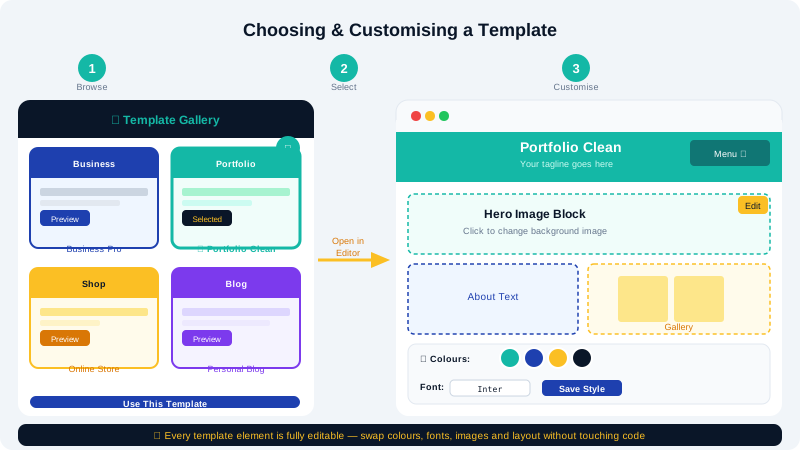
Choosing the Right Template
When browsing the template gallery, keep these points in mind:
- Focus on layout, not colour. Every template's colours and fonts can be changed. Choose a template whose section arrangement and page structure match your needs.
- Consider your content type. A portfolio site needs a strong image gallery layout; a service business needs a features section and a contact form; a restaurant needs a menu section.
- Check the mobile view. Click the mobile preview icon on any template to see how it adapts to smaller screens before committing.
To switch to a different template after you have started editing, look for a Change Template option in the editor menu. Note that switching templates replaces the layout — your typed content may need to be re-entered, so it is best to choose carefully upfront.
Changing Colours and the Colour Palette
The fastest way to rebrand a template is to update its colour palette:
- In the editor, open Site Styles or Design Settings from the left sidebar or top menu.
- Look for Colours or Colour Palette. The palette usually contains 3–5 preset colours used consistently across headings, buttons, backgrounds, and accents.
- Click any colour swatch and use the colour picker to enter your brand's hex code (e.g.,
#1A73E8) or choose visually. - Changes apply site-wide instantly — all buttons, headings, and accents that use that palette slot update together.
Changing Fonts and Typography
- Open Site Styles → Fonts or Typography.
- Select a font pairing for headings and body text from the available choices.
- Adjust the default sizes for H1, H2, body, and button text if needed.
Consistent typography across all pages is handled automatically — changing it in Site Styles updates the whole site.
Editing the Header and Logo
- Click on the header section at the top of your page in the canvas.
- To replace the placeholder logo, select the logo element and click Replace Image or Upload Logo. Upload your logo file (PNG with a transparent background is recommended).
- Edit navigation menu items by clicking on each link label and typing your page name.
- Adjust the header background colour or transparency in the right-hand style panel.
Editing Sections
Each page is built from stacked sections (hero, about, features, testimonials, footer, etc.):
- Click on any section in the canvas to select it.
- Use the section toolbar that appears to:
- Move the section up or down.
- Duplicate the section.
- Delete the section.
- Change the background (colour, gradient, or image).
- To add a new section, click the + icon that appears between sections or use the Add Section panel in the left sidebar. Choose from pre-designed section layouts.
Editing Text, Images, and Buttons
- Text: Click any text element to select it, then type directly. Use the toolbar that appears to change size, weight, alignment, or colour for the selected text.
- Images: Click an image element, then click Replace or Change Image to upload your own photo or choose from the stock library.
- Buttons: Click a button to edit its label. In the right panel, set the link destination (another page, an external URL, or an anchor on the same page) and change the button style (filled, outlined, ghost).
Saving Your Customisations
Your edits save automatically, but click Save in the top toolbar after any significant change to ensure nothing is lost. When you are happy with the design, head to Publishing and Updating Your Website to take the site live.
For design questions or technical help, reach CyclebreezeHost support at info@cyclebreezehost.com — available 24/7.