How to Create and Manage Subdomains
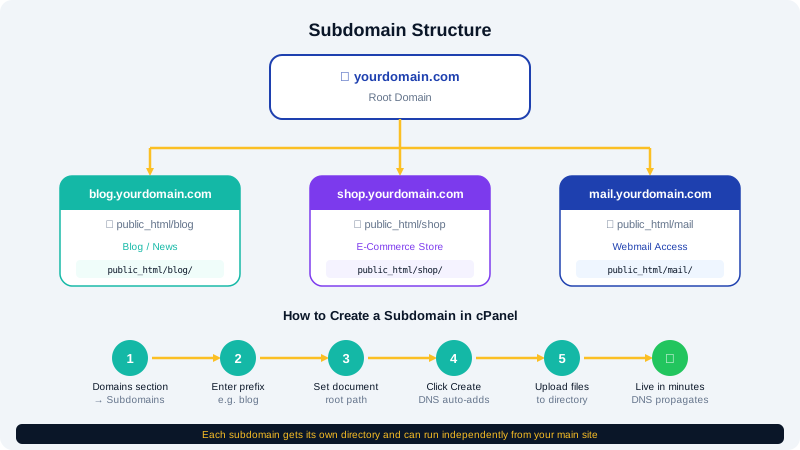
A subdomain lets you create a distinct section of your website under your existing domain — for example, blog.yourdomain.com, shop.yourdomain.com, or staging.yourdomain.com. Each subdomain gets its own directory on your server and can run independently from your main site. CyclebreezeHost's cPanel makes it straightforward to create, configure, and remove subdomains at any time.
What Is a Subdomain?
A subdomain is a prefix added to your root domain, separated by a dot. It resolves as a separate address but uses the same hosting account and DNS zone. You can use subdomains to host a blog, a store, a support portal, or a development copy of your site — all without purchasing an extra hosting plan.
Creating a Subdomain
- Log in to the Client Area at https://clients.cyclebreezehost.com and open cPanel for your hosting account.
- In the Domains section, click Subdomains.
- In the Subdomain field, enter the prefix you want — for example,
blog. - In the Domain dropdown, select the domain you want to attach it to.
- The Document Root field will auto-fill with a path such as
public_html/blog. You can change this path if you prefer a different directory. - Click Create. cPanel will create the directory and add the necessary DNS entry automatically.
Your subdomain will usually be accessible within a few minutes once DNS propagates locally, though full global propagation can take up to 24 hours.
Uploading Files to a Subdomain
After creation, your subdomain's files live in the document root you specified (for example, public_html/blog). You can upload files there in two ways:
- File Manager — In cPanel, open File Manager, navigate to the subdomain's folder, and upload or create files directly.
- FTP/SFTP — Connect with an FTP client using your cPanel FTP credentials and navigate to the same folder.
Any index.html or index.php file placed in that directory will become the subdomain's homepage.
Installing an Application on a Subdomain
You can use Softaculous to install WordPress, Joomla, or any other supported application directly onto a subdomain:
- Open Softaculous Apps Installer in cPanel.
- Select the application you want to install.
- Under Choose Protocol / Domain, select your subdomain (e.g.,
blog.yourdomain.com) from the dropdown. - Complete the installation wizard as normal.
Managing Existing Subdomains
To view or modify your subdomains, return to Subdomains in cPanel. From the list you can:
- Redirect a subdomain to a different URL by clicking Manage Redirection next to it.
- Remove a subdomain by clicking Remove. This deletes the subdomain entry and its DNS record but does not delete the files in the document root folder — you must remove those manually if needed.
SSL for Subdomains
CyclebreezeHost includes free Let's Encrypt SSL via AutoSSL, which automatically issues and renews certificates for your subdomains. After creating a subdomain, AutoSSL typically provisions a certificate within a few hours. You can check the status under SSL/TLS Status in cPanel.
Common Use Cases
| Subdomain | Typical Purpose |
|---|---|
www | Canonical web alias (usually auto-created) |
blog | Blog or news section |
shop | E-commerce store |
staging | Development/testing copy |
mail | Webmail access |
api | API endpoint for a web app |
If you run into any issues creating or configuring a subdomain, open a support ticket in the Client Area or email info@cyclebreezehost.com — CyclebreezeHost's team is available 24/7.