Creating Custom Error Pages (404, 403, 500)
When something goes wrong — a broken link, a forbidden directory, or a server fault — visitors see an error page. The default pages served by Apache or LiteSpeed are stark and generic, offering no navigation back to your site. Replacing them with custom branded pages keeps visitors oriented and gives you a chance to guide them toward useful content instead of losing them entirely.
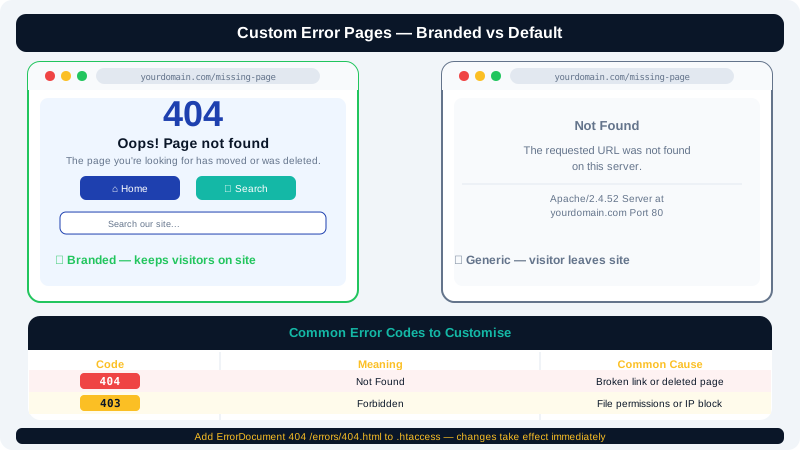
Common HTTP Error Codes
| Code | Meaning | Common Cause |
|---|---|---|
400 | Bad Request | Malformed URL or request |
401 | Unauthorised | Missing authentication |
403 | Forbidden | File permissions or IP block |
404 | Not Found | Broken link or deleted page |
500 | Internal Server Error | PHP fatal error or bad .htaccess |
Method 1: Using the cPanel Error Pages Tool
cPanel provides a built-in editor for common error codes.
- Log in to cPanel at
clients.cyclebreezehost.com. - Go to Advanced → Error Pages.
- Select the domain you want to customise from the dropdown.
- Click on the error code you want to edit (e.g., 404 Not Found).
- Write your HTML directly in the editor. Use the available tags (shown as buttons in the editor) to insert dynamic values such as:
<!--#echo var="HTTP_REFERER" -->— the referring URL<!--#echo var="REQUEST_URI" -->— the URL that caused the error
- Click Save when done.
Repeat this process for each error code you want to customise.
Method 2: Creating HTML Files Manually
For full control over design, create standalone HTML files and reference them from .htaccess.
Step 1 — Create the error page files
- Open File Manager in cPanel and navigate to
public_html. - Create a new folder called
errors(or any name you prefer). - Inside that folder, create files named
404.html,403.html, and500.html. - Edit each file with your branded HTML. Keep pages lightweight — avoid heavy JavaScript or external stylesheets that might themselves fail to load during a server error.
Example 404.html structure:
<!DOCTYPE html>
<html lang="en">
<head>
  <meta charset="UTF-8">
  <title>Page Not Found – YourSite</title>
</head>
<body>
  <h1>We couldn't find that page.</h1>
  <p>It may have moved or been deleted.</p>
  <a href="/">Return to homepage</a>
</body>
</html>
Step 2 — Point Apache/LiteSpeed to your files
- In File Manager, open the
.htaccessfile inpublic_html(enable hidden files if it is not visible). - Add the following directives, adjusting paths to match your file locations:
ErrorDocument 403 /errors/403.html
ErrorDocument 404 /errors/404.html
ErrorDocument 500 /errors/500.html
- Save the file. Changes take effect immediately.
Testing Your Error Pages
- 404: Visit a URL you know does not exist on your site — for example,
https://yourdomain.com/this-page-does-not-exist. - 403: Temporarily set a folder's permissions to
000using File Manager → Permissions, then visit its URL. Reset permissions afterward. - 500: Introduce a deliberate syntax error in a
.phpfile, reload the page, then fix it.
Best Practices
- Include your site's main navigation on custom error pages so visitors can continue browsing.
- Add a search bar on 404 pages to help users find what they were looking for.
- Log 404 errors using a web analytics tool to find and fix broken internal links over time.
- Keep the 500 error page fully self-contained (inline CSS) so it renders even if your CDN or external resources are unreachable.
- Ensure custom error pages return the correct HTTP status code — the page content is separate from the status code the server sends.
If your custom error pages are not appearing after editing .htaccess, check for syntax errors in the file or contact CyclebreezeHost support at info@cyclebreezehost.com. The team is available 24/7.