Fixing WordPress Email with an SMTP Plugin
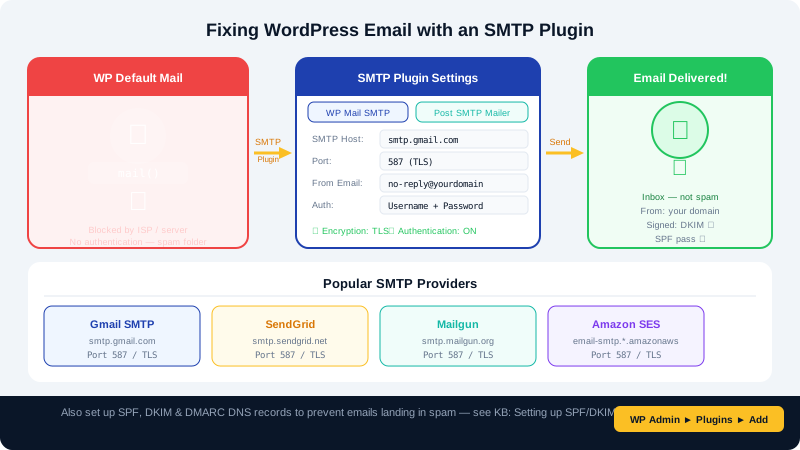
By default, WordPress sends email using the PHP mail() function, which many receiving mail servers distrust or silently drop. If your users are not receiving password reset emails, order confirmations, or contact form notifications, the cause is almost always this unreliable delivery method. Configuring an SMTP plugin tells WordPress to send mail through an authenticated mail server — the same way a desktop email client works — dramatically improving deliverability.
What You Will Need
- Access to your WordPress dashboard at
yourdomain.com/wp-admin. - An SMTP account. Good options include:
- Your CyclebreezeHost cPanel email account (free, included with your hosting).
- Gmail (free with a Google account, requires an App Password).
- Brevo (formerly Sendinblue), Mailgun, or SendGrid for transactional volume.
Step 1: Install WP Mail SMTP
- Go to Plugins > Add New and search for WP Mail SMTP.
- Click Install Now next to the plugin by WPForms, then click Activate.
- The setup wizard will launch. Click Let's Get Started.
Step 2: Choose Your Mailer
On the mailer selection screen, pick the service you will use:
| Mailer | Best For |
|---|---|
| Other SMTP | cPanel email, any standard SMTP provider |
| Gmail | Low-volume sites using a Google Workspace or personal account |
| Brevo / Mailgun / SendGrid | High-volume transactional email |
Select your choice and click Save and Continue.
Step 3: Configure SMTP Settings (cPanel Email Example)
If you are using a cPanel email account such as wordpress@yourdomain.com:
- First, create the email account in cPanel under Email Accounts if you have not already.
- Back in the WP Mail SMTP plugin, choose Other SMTP and enter:
- SMTP Host:
mail.yourdomain.com - Encryption:
SSL - SMTP Port:
465 - Auto TLS: On
- Authentication: On
- SMTP Username:
wordpress@yourdomain.com(full email address) - SMTP Password: the password you set for this email account
- SMTP Host:
- Set the From Email to the same address and add a From Name (e.g., "CyclebreezeHost Site").
- Click Save Settings.
Step 4: Send a Test Email
- In the plugin dashboard, click the Email Test tab.
- Enter a recipient address you can check immediately.
- Click Send Email.
- If delivery succeeds, you will see a green confirmation. If it fails, the error message will point directly to the misconfigured setting (wrong port, bad credentials, etc.).
Troubleshooting Common Errors
- Authentication failed: Double-check your SMTP username and password. For Gmail, you must use an App Password — not your regular Google password. Generate one at Google Account > Security > 2-Step Verification > App Passwords.
- Connection timed out: Your host's firewall may block outbound port 465 or 587. Try the other port, or use a mailer with an API-based delivery option (Brevo, Mailgun) which avoids direct SMTP port connections.
- SSL certificate error: Enable Auto TLS in the plugin settings, or switch encryption from SSL to TLS and change the port from 465 to 587.
- Emails still going to spam: Add an SPF record and DKIM record to your domain's DNS. CyclebreezeHost cPanel email accounts include DKIM signing — enable it under Email > Email Deliverability in cPanel.
Keeping Credentials Secure
Avoid storing SMTP passwords directly in the plugin's database. WP Mail SMTP Pro supports storing credentials in wp-config.php as PHP constants, which are never written to the database:
define( 'WPMS_SMTP_PASS', 'your-smtp-password' );
Check the plugin's documentation for the full list of supported constants.
Need Help?
If you are still experiencing email delivery problems after following this guide, contact our team 24/7 via clients.cyclebreezehost.com or at info@cyclebreezehost.com.