Getting Started with the Website Builder
CyclebreezeHost includes a drag-and-drop Website Builder that lets you create a professional website without writing a single line of code. You choose a template, customise it visually, add your content, and publish — all from your browser. This article introduces the builder and walks you through opening it for the first time.
What the Website Builder Offers
- Ready-made templates covering common website types: business, portfolio, blog, restaurant, e-commerce, and more.
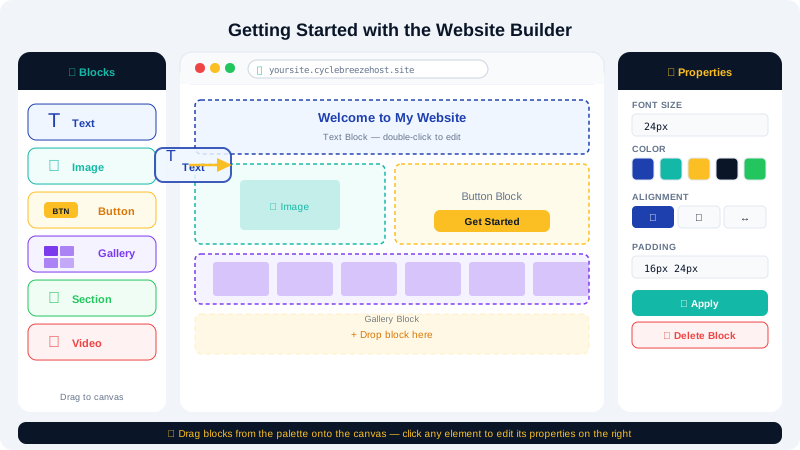
- Drag-and-drop editor to move sections, columns, text blocks, images, and buttons anywhere on the page.
- Built-in sections such as hero banners, contact forms, testimonials, galleries, and pricing tables.
- One-click publishing to make your site live instantly on your domain.
- No hosting upgrades required — the builder is included with your CyclebreezeHost hosting plan.
Before You Begin
You will need:
- An active CyclebreezeHost hosting account.
- A domain either registered with CyclebreezeHost or pointing to your hosting account. (You can also preview your site on a temporary URL before connecting a domain.)
- Access to cPanel or the Client Area.
Opening the Website Builder
From the Client Area
- Log in to the CyclebreezeHost Client Area at https://clients.cyclebreezehost.com.
- Navigate to your hosting product and click Manage.
- Look for the Website Builder shortcut and click Launch.
From cPanel
- Log in to cPanel.
- Scroll to the Website Builder section (or search for it in the cPanel search bar).
- Click the Website Builder icon to open the editor in a new tab.
Choosing Your First Template
When you open the Website Builder for the first time, you will be prompted to select a template:
- Browse the template gallery. Use the category filters (Business, Portfolio, Blog, etc.) to narrow down your options.
- Click a template thumbnail to preview it at full size.
- When you find one you like, click Use This Template or Select.
Your template is just a starting point — every element can be changed, moved, or deleted later. Do not worry about finding a perfect match; focus on the overall layout that suits your content.
The Editor Interface
After selecting a template, the drag-and-drop editor opens. The key areas are:
| Area | Description |
|---|---|
| Left sidebar | Add sections, elements (text, images, buttons), and pages |
| Canvas | Live preview of your website — drag and click directly on it |
| Top toolbar | Switch between desktop, tablet, and mobile previews; undo/redo; publish |
| Right panel | Style controls for the currently selected element |
Saving Your Work
The Website Builder saves your changes automatically as you work. You can also click Save in the top toolbar at any time. Saving does not publish your site — it only stores your draft. See Publishing and Updating Your Website for how to go live.
Next Steps
Once you are comfortable with the interface, explore the other articles in this section:
- Choosing and Customising a Template — change colours, fonts, and branding.
- Adding Pages and Content — build out your site structure.
- Connecting Your Domain to Your Site — point your domain at the builder.
- Adding a Contact Form and SEO Settings — capture leads and rank in search.
If you need help at any stage, contact CyclebreezeHost support at info@cyclebreezehost.com — available 24/7.