How to Install WordPress via Softaculous
Softaculous is an auto-installer included with your CyclebreezeHost hosting account that makes it easy to install WordPress and hundreds of other applications with just a few clicks. This guide walks you through the entire process.
Step 1: Open Softaculous in cPanel
- Log in to your cPanel dashboard.
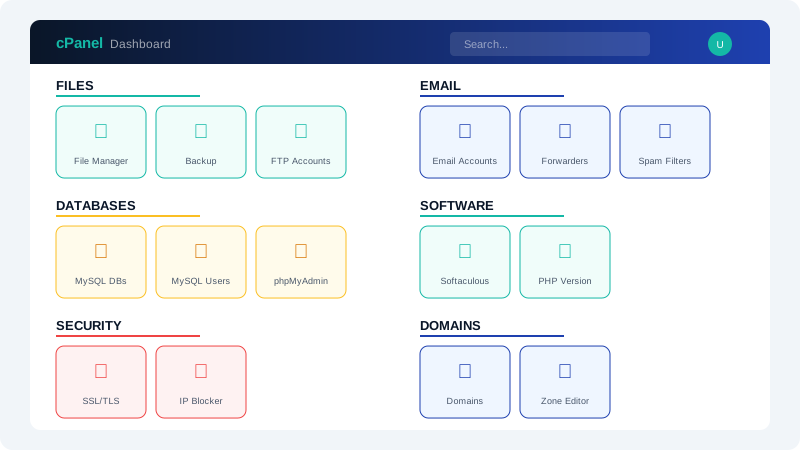
- Scroll to the Software section and click Softaculous Apps Installer.
- On the Softaculous homepage, you will see WordPress featured prominently. Click on the WordPress icon, or use the search bar to find it.
Step 2: Start the Installation
- On the WordPress overview page, click the Install button.
- You will be presented with the installation configuration form.
Step 3: Configure Installation Settings
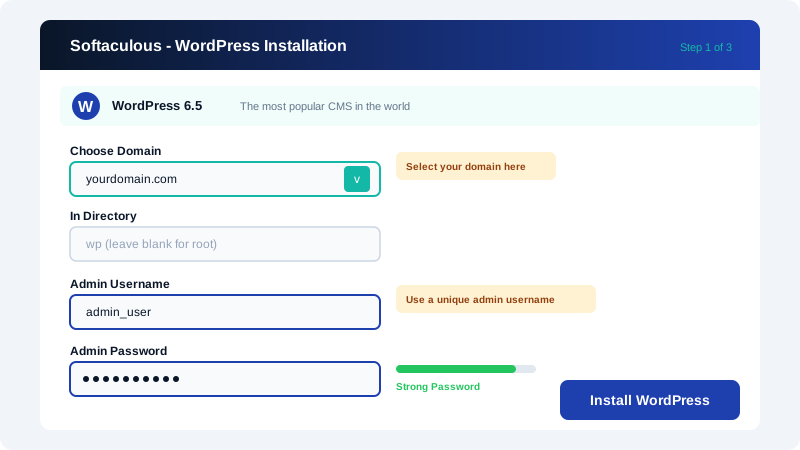
Fill in the following sections carefully:
Software Setup:
- Choose Protocol: Select
https://if you have an SSL certificate installed (recommended). Otherwise, usehttp://. - Choose Domain: Select the domain where WordPress should be installed.
- In Directory: Leave this blank to install WordPress on your main domain (e.g.,
yourdomain.com). Enter a folder name likeblogif you want it atyourdomain.com/blog.
Site Settings:
- Site Name: Enter your website's title (you can change this later).
- Site Description: Enter a short tagline for your site.
Admin Account:
- Admin Username: Choose a unique username. Avoid using
adminfor security reasons. - Admin Password: Set a strong password with at least 12 characters.
- Admin Email: Enter a valid email address for password resets and notifications.
Choose Language: Select your preferred language.
Select Plugins: Softaculous may offer optional plugins. You can skip these and install plugins later from within WordPress.
Advanced Options (optional):
- You can customize the database name and table prefix if desired.
- Enable automatic backups by selecting a backup rotation schedule.
Step 4: Install
Review your settings and click the Install button at the bottom of the page. Softaculous will install WordPress and display a confirmation with links to your new site and the admin dashboard.
Step 5: Post-Installation Steps
After installation, take these important steps:
- Log in to WordPress at
yourdomain.com/wp-adminusing the admin credentials you set. - Delete sample content such as the default "Hello World" post and sample page.
- Set permalinks by going to Settings > Permalinks and choosing "Post name" for clean URLs.
- Install a theme under Appearance > Themes to customize your site's look.
- Install essential plugins such as a security plugin, caching plugin, and SEO plugin.
- Update everything to the latest version, including WordPress core, themes, and plugins.
Managing Your Installation
You can manage, update, back up, and remove your WordPress installation at any time through Softaculous by clicking the Installations tab at the top of the Softaculous dashboard in cPanel.
If you need assistance at any point during the installation process, our support team is here to help.