Installing a Control Panel on Your VPS
A control panel gives you a graphical interface to manage websites, databases, email accounts, and DNS records without relying solely on the command line. CyclebreezeHost VPS plans support cPanel/WHM (licensed separately) as well as several free alternatives. This guide walks you through your options and how to install them.
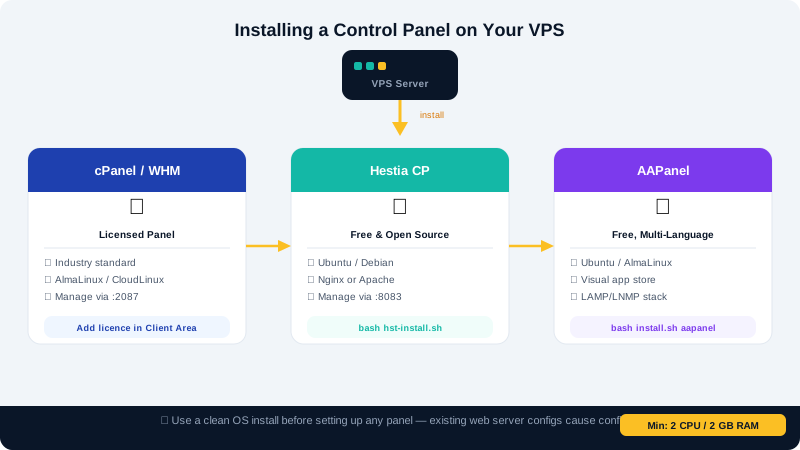
Before You Start
- You need root SSH access to your VPS. If you have not yet connected via SSH, see the article on connecting to your VPS for the first time.
- Make sure your server has a clean OS installation. Installing a control panel on top of an existing web server configuration often causes conflicts.
- Minimum recommended specifications: 2 CPU cores, 2 GB RAM, 20 GB disk (cPanel requires 1 GB RAM minimum; 2 GB or more is strongly recommended).
- Point your hostname to your server IP in DNS before starting — many panel installers register the server hostname during setup.
Option 1: cPanel/WHM (Licensed)
cPanel is the industry-standard commercial panel. CyclebreezeHost offers optional cPanel licences that you can add through the Client Area at https://clients.cyclebreezehost.com.
- Log in to the Client Area, navigate to your VPS, and add a cPanel licence add-on.
- Once the licence is active, SSH into your server as
root. - Run the official installer:
cd /home && curl -o latest -L https://securedownloads.cpanel.net/latest && sh latest - Installation takes 30–60 minutes. When complete, access WHM at
https://your-ip:2087. - Complete the WHM setup wizard, then create cPanel accounts for each domain you want to host.
cPanel is supported on AlmaLinux 8/9 and CloudLinux. It is not supported on Debian or Ubuntu.
Option 2: Hestia Control Panel (Free)
HestiaCP is a lightweight free panel that works on Ubuntu and Debian.
- SSH into your server as
root. - Download and run the installer:
wget https://raw.githubusercontent.com/hestiacp/hestiacp/release/install/hst-install.sh bash hst-install.sh - Follow the on-screen prompts. Choose your web server (Apache, Nginx, or both), mail server, and database engine.
- When installation finishes, the installer displays the panel URL, admin username, and temporary password.
- Log in at
https://your-ip:8083and change your password immediately.
Option 3: AAPanel (Free, Multi-Language)
AAPanel (also known as BT Panel) is a popular free panel with a visual app store.
- On Ubuntu/Debian:
wget -O install.sh https://www.aapanel.com/script/install_6.0_en.sh && bash install.sh aapanel - On AlmaLinux/CentOS:
yum install -y wget && wget -O install.sh https://www.aapanel.com/script/install_6.0_en.sh && bash install.sh aapanel - The installer outputs your panel URL and credentials. Access the panel and install the LNMP or LAMP stack from the dashboard.
Post-Installation Steps
- Firewall: Open only the ports you need. At minimum allow 80 (HTTP), 443 (HTTPS), 22 (SSH), and your panel's management port.
- Updates: Keep the panel and OS patched. Run
apt update && apt upgrade(Debian/Ubuntu) ordnf update(AlmaLinux) regularly. - Backups: Configure automated backups in the panel. CyclebreezeHost also offers snapshot options from the server control panel in the Client Area.
Getting Help
If you run into issues during installation, open a support ticket in the Client Area or email info@cyclebreezehost.com. Our team is available 24/7.