Installing a Free SSL Certificate with Certbot
SSL certificates encrypt traffic between your visitors and your server, protect sensitive data, and are required by modern browsers to show the padlock icon. Let's Encrypt provides free, trusted SSL certificates renewed automatically by a tool called Certbot. This guide covers installation for both Apache and Nginx on Ubuntu and Debian.
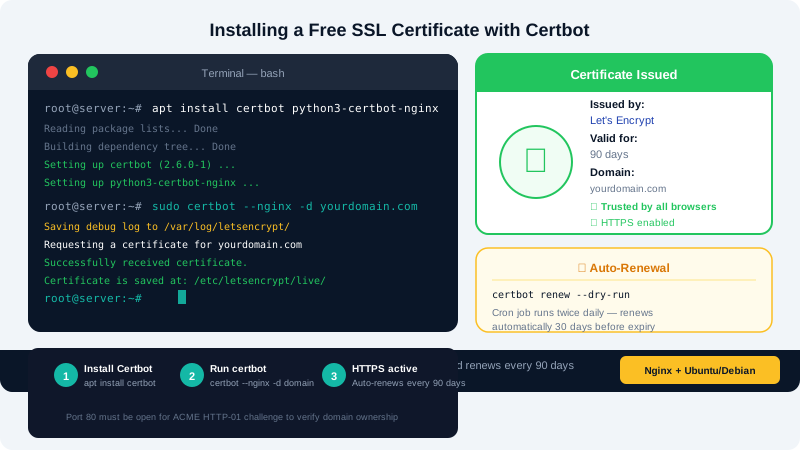
Prerequisites
- Root or sudo SSH access to your VPS.
- A domain name with its DNS A record pointing to your server's public IP.
- Apache or Nginx already installed and serving your domain on port 80.
- Port 80 and 443 open in your firewall.
If your firewall is managed with ufw, allow both ports:
ufw allow 80
ufw allow 443
ufw reload
Step 1: Install Certbot
Update your package list first, then install Certbot along with the plugin for your web server.
For Apache:
apt update
apt install certbot python3-certbot-apache -y
For Nginx:
apt update
apt install certbot python3-certbot-nginx -y
Step 2: Obtain and Install the Certificate
Run Certbot with the appropriate plugin. It will read your web server configuration, verify domain ownership via an HTTP challenge, and install the certificate automatically.
For Apache:
certbot --apache -d yourdomain.com -d www.yourdomain.com
For Nginx:
certbot --nginx -d yourdomain.com -d www.yourdomain.com
During the process you will be asked to:
- Provide an email address for expiry notifications.
- Agree to the Let's Encrypt Terms of Service.
- Optionally subscribe to the EFF mailing list.
Certbot then automatically updates your Apache virtual host or Nginx server block to:
- Add the certificate and private key paths.
- Listen on port 443 (HTTPS).
- Redirect HTTP traffic to HTTPS.
Step 3: Verify the Certificate
Visit https://yourdomain.com in your browser. The padlock icon and "https://" in the address bar confirm the certificate is active.
You can also check the certificate details from the command line:
certbot certificates
This lists all certificates managed by Certbot on your server, along with their expiry dates and domain names.
Step 4: Test Automatic Renewal
Let's Encrypt certificates expire after 90 days. Certbot installs a systemd timer (or cron job) that renews certificates automatically when they are within 30 days of expiry.
Test that the renewal process runs without errors:
certbot renew --dry-run
A message ending in Congratulations, all simulated renewals succeeded means automatic renewal is working correctly.
Check the timer status:
systemctl status certbot.timer
Obtaining a Wildcard Certificate
A wildcard certificate (*.yourdomain.com) covers all subdomains. It requires a DNS challenge instead of an HTTP challenge — you must add a TXT record to your DNS zone when prompted:
certbot certonly --manual --preferred-challenges dns -d "*.yourdomain.com" -d yourdomain.com
Follow the on-screen instructions to add the required _acme-challenge TXT record in your DNS provider's control panel, then press Enter to continue.
Note: Wildcard certificates cannot be renewed automatically with the --manual flag. Consider using a DNS plugin (such as python3-certbot-dns-cloudflare) if your DNS provider is supported.
Common Issues
| Problem | Solution |
|---|---|
Connection refused on port 80 | Ensure your web server is running and port 80 is open in the firewall |
DNS problem: NXDOMAIN | Your domain's A record has not propagated yet — wait a few minutes |
Too many certificates error | Let's Encrypt rate-limits issuance; use --staging flag for testing |
| Certificate not trusted | Run certbot renew to update an expired cert |
Further Help
If you encounter an error not covered here, the full error message from Certbot usually contains a link to the relevant Let's Encrypt community page. You can also contact CyclebreezeHost support at info@cyclebreezehost.com or raise a ticket in the Client Area at https://clients.cyclebreezehost.com.