Installing Plugins and Themes
Plugins extend what WordPress can do — adding contact forms, SEO tools, e-commerce, security features, and much more. Themes control the visual design and layout of your site. WordPress gives you several ways to install both, and this article walks you through each method.
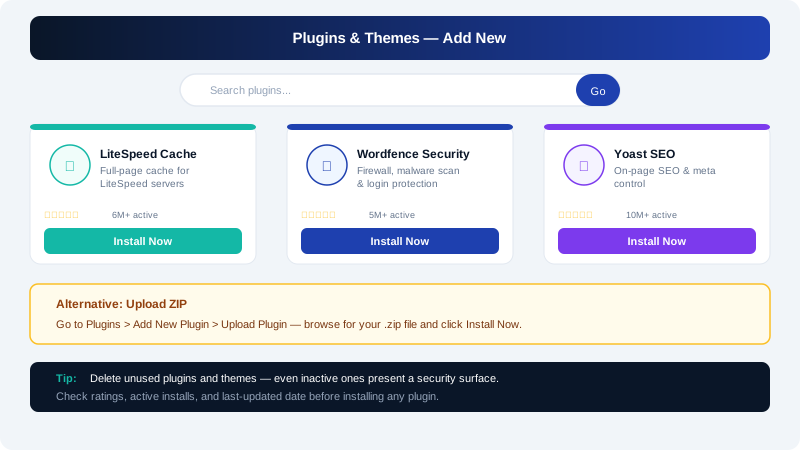
Installing Plugins
Method 1: From the WordPress Plugin Directory (Recommended)
The plugin directory at wordpress.org contains tens of thousands of free plugins you can install directly from your dashboard without downloading anything.
- Log in to
yourdomain.com/wp-admin. - In the left menu, go to Plugins > Add New Plugin.
- Use the search bar to find the plugin by name or keyword.
- Click Install Now on the plugin card.
- Once installed, click Activate to enable it.
The plugin is now active and ready to configure. Most plugins add a settings page under the left menu or within Settings.
Method 2: Upload a ZIP File
Use this method for premium plugins purchased from a third-party marketplace, or any plugin you have downloaded as a .zip file.
- Go to Plugins > Add New Plugin.
- Click Upload Plugin at the top of the page.
- Click Choose File, select the
.zipfile from your computer, and click Install Now. - After installation completes, click Activate Plugin.
Method 3: Upload via cPanel File Manager
Use this method if the dashboard upload fails due to a file size limit.
- Log in to cPanel and open File Manager.
- Navigate to
public_html/wp-content/plugins/(adjust if WordPress is in a subdirectory). - Click Upload and select the plugin
.zipfile. - Right-click the
.zipfile and choose Extract. - Return to your WordPress dashboard, go to Plugins > Installed Plugins, and click Activate next to the new plugin.
Installing Themes
Method 1: From the WordPress Theme Directory
- Go to Appearance > Themes.
- Click Add New Theme.
- Browse the directory or use the search and filter tools to find a theme.
- Hover over a theme and click Install, then Activate.
Method 2: Upload a ZIP File
- Go to Appearance > Themes.
- Click Add New Theme, then Upload Theme.
- Click Choose File, select the theme
.zipfile, and click Install Now. - Click Activate to make it your active theme.
Method 3: Upload via cPanel File Manager
- In cPanel > File Manager, navigate to
public_html/wp-content/themes/. - Upload and extract the theme
.zipfile. - Activate the theme from Appearance > Themes in your dashboard.
Recommended First Plugins for CyclebreezeHost Sites
| Plugin | Purpose |
|---|---|
| LiteSpeed Cache | Full-page caching optimised for LiteSpeed servers — free and highly effective |
| Wordfence Security | Firewall, malware scanning, and login protection |
| UpdraftPlus | Scheduled backups to remote cloud storage |
| Yoast SEO or Rank Math | On-page SEO optimisation and metadata control |
| WP Mail SMTP | Reliable transactional email delivery via SMTP |
Tips for Safe Plugin and Theme Management
- Install only what you need. Unused plugins and themes still present a security surface even when deactivated — delete anything you are not using.
- Check ratings and update history. Before installing, review the star rating, number of active installations, and the date of the last update. Avoid plugins that have not been updated in over a year.
- Use child themes for customisation. If you modify a theme's files directly, updates will overwrite your changes. Create a child theme to keep your customisations safe.
- Back up before installing new plugins. Use Softaculous in cPanel to take a quick backup before trying an unfamiliar plugin.
If you encounter any issues installing or activating plugins or themes, contact CyclebreezeHost support at info@cyclebreezehost.com — we are here 24/7.