Migrating a WordPress Site to CyclebreezeHost
Moving your WordPress site to CyclebreezeHost does not have to mean hours of downtime or technical complexity. You can complete the migration using a free plugin in under an hour, or do it manually if you prefer full control. This guide walks through both approaches.
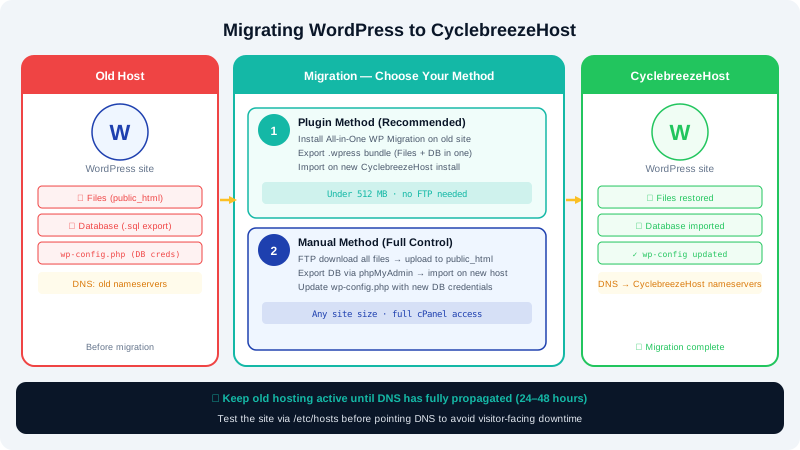
Before You Start
- Create a full backup of your existing site (files and database) at your current host.
- Set up your new CyclebreezeHost hosting account and confirm it is active in your Client Area.
- Install WordPress on your CyclebreezeHost account using Softaculous in cPanel, or prepare a fresh database manually.
Method 1: Migrate With a Plugin (Recommended)
All-in-One WP Migration is a straightforward tool for most sites under 512 MB.
- On your old site, go to Plugins > Add New, search for All-in-One WP Migration, install, and activate it.
- Go to All-in-One WP Migration > Export > Export to File. The plugin bundles your files and database into a single
.wpressarchive. - Download the
.wpressfile to your computer. - On your new CyclebreezeHost site, install and activate the same plugin.
- Go to All-in-One WP Migration > Import > Import from File and upload the
.wpressarchive. - Confirm the warning prompt — this will overwrite the fresh WordPress installation with your migrated content.
- When the import completes, click Permalinks > Save Changes in Settings to flush rewrite rules.
- Log in using your old site's credentials — these have been imported along with everything else.
Method 2: Manual Migration
Use this method for large sites, multisite networks, or when you need precise control.
Step 1 — Export the Database
- On your old host, open phpMyAdmin, select your WordPress database, and click Export > Quick > Go.
- Save the
.sqlfile to your computer.
Step 2 — Transfer Files
- Connect to your old host via FTP or the cPanel File Manager and download the entire
public_html(or subdirectory) folder. - Upload these files to the corresponding directory on your CyclebreezeHost account.
Step 3 — Create a Database and Import
- In your CyclebreezeHost cPanel, go to MySQL Databases and create a new database, user, and password. Grant the user All Privileges on the database.
- Open phpMyAdmin, select the new database, and click Import. Choose the
.sqlfile and click Go.
Step 4 — Update wp-config.php
- Open
wp-config.phpin the File Manager or via FTP. - Update
DB_NAME,DB_USER,DB_PASSWORD, andDB_HOST(usuallylocalhost) to match the new database credentials.
Step 5 — Update Site URLs
If your domain or path has changed, run the following in phpMyAdmin (replace values as needed):
UPDATE wp_options SET option_value = 'https://yourdomain.com' WHERE option_name = 'siteurl' OR option_name = 'home';
Pointing Your Domain to CyclebreezeHost
Once you have verified the site loads correctly on your CyclebreezeHost IP or temporary URL:
- Log in to your domain registrar and update the nameservers to CyclebreezeHost's nameservers (listed in your Client Area welcome email).
- DNS propagation typically takes 1–24 hours.
Need Help?
Our migration team is available 24/7. Open a ticket at clients.cyclebreezehost.com or email info@cyclebreezehost.com.