Scheduling Automatic Backups with JetBackup
JetBackup is the backup system integrated into your CyclebreezeHost cPanel account. It takes scheduled snapshots of your files, databases, emails, and cPanel settings, and stores them independently from your live account. When something goes wrong — an accidental deletion, a failed update, or a corrupted database — you can restore individual items without rolling back your entire account.
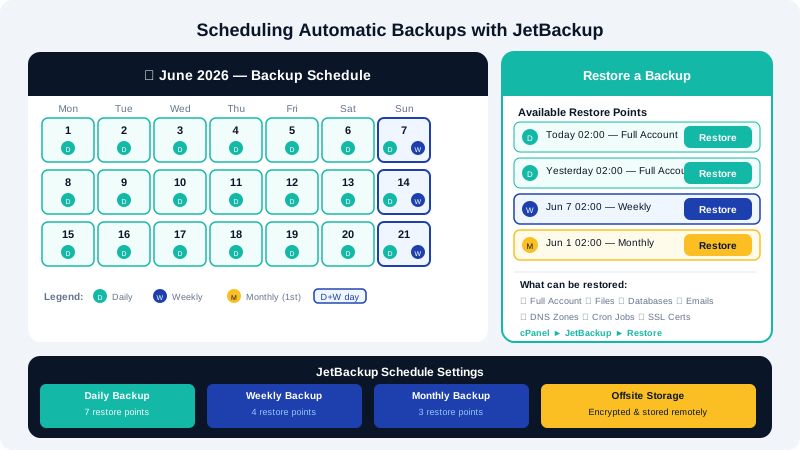
Accessing JetBackup
- Log in to cPanel at
clients.cyclebreezehost.com. - Scroll to the Files section and click JetBackup 5.
The JetBackup dashboard shows the most recent backup jobs and restoration options.
Understanding Backup Types
| Backup Type | What It Covers |
|---|---|
| Full Account | All files, databases, emails, DNS zones, and cPanel config |
| Home Directory | All files under ~/ including public_html |
| Databases | MySQL/MariaDB databases individually |
| Emails | Email accounts and their stored messages |
| DNS Zones | Domain DNS configuration |
| Cron Jobs | Scheduled cron tasks |
| SSL Certificates | Installed SSL certificates |
Viewing Available Backup Points
- In JetBackup, click Backup Queue to see recent and scheduled jobs.
- Click Full Backups (or the relevant category) to see a list of available restore points with timestamps.
CyclebreezeHost runs server-side scheduled backups automatically. The retention schedule and frequency depend on your hosting plan — check your plan details or contact support for specifics.
Creating an On-Demand Backup
Before making significant changes (e.g., a major plugin update or a theme redesign), create a manual snapshot:
- In JetBackup, click Create Backup or the equivalent button on the dashboard.
- Select the backup type — Full Account for a complete snapshot.
- Click Create Backup. The job is queued and typically completes within a few minutes depending on account size.
- Refresh Backup Queue to confirm the job completed successfully.
Restoring Files
- In JetBackup, click Home Directory under the restore options.
- Select a backup date from the list of restore points.
- Browse the backup's file tree to find the specific file or folder you need.
- Check the box next to the item and click Restore Selected.
- Choose Restore (overwrites current) or Restore to a new location to compare before replacing.
- Confirm the action. The file is restored within seconds.
Restoring a Database
- Click Databases in the JetBackup menu.
- Select the backup date and the specific database you need.
- Click Restore to overwrite the live database, or Download to get a
.sql.gzfile you can inspect and import manually via phpMyAdmin.
Restoring a database overwrites all current data in that database. If you only need to recover a single table or row, download the backup and import selectively via phpMyAdmin.
Restoring Email
- Click Emails in JetBackup.
- Select the backup date and the email account.
- Click Restore to restore all messages to that account, or browse individual folders and restore selectively.
Downloading a Backup to Your Local Machine
You can download any backup item for off-site storage:
- Navigate to the backup type (e.g., Databases).
- Select the restore point and item.
- Click Download instead of Restore.
- The file downloads to your local computer in compressed format.
Keeping at least one recent backup copy locally is good practice in addition to the server-side copies JetBackup maintains.
Best Practices
- Create a manual backup before every significant change: plugin updates, PHP version upgrades, theme changes.
- Test your restore process before you need it — restore a single non-critical file to verify the process works.
- Download a full account backup monthly and store it off-site.
- Monitor the Backup Queue to confirm scheduled backups are completing without errors.
If you encounter errors restoring a backup or need to recover data from a specific point in time outside your visible restore points, contact CyclebreezeHost support at info@cyclebreezehost.com. The team is available 24/7.