Setting Up a LEMP Stack with Nginx
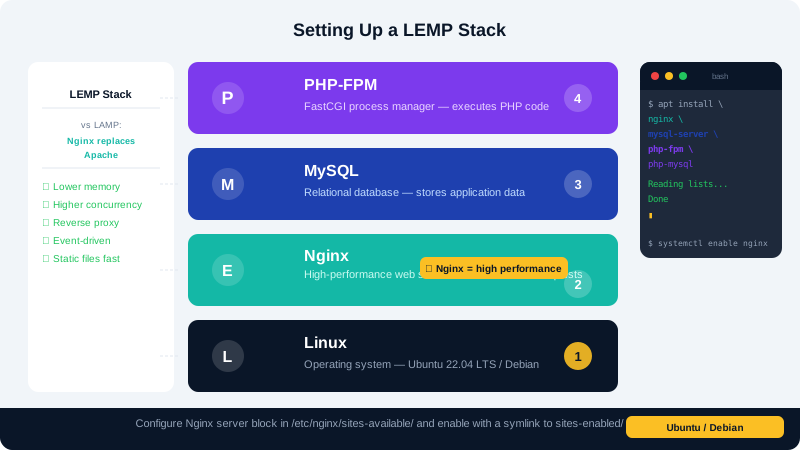
A LEMP stack — Linux, Nginx (pronounced "Engine-X"), MySQL, and PHP — is a high-performance alternative to the traditional Apache-based LAMP stack. Nginx handles static files and concurrent connections more efficiently, making it a popular choice for busy or resource-constrained VPS environments. This guide covers a complete LEMP installation on Ubuntu or Debian.
Prerequisites
- Root or sudo SSH access to your VPS.
- Ubuntu 22.04/24.04 or Debian 11/12.
- A domain name with its DNS A record pointing to your server IP.
Step 1: Update the System
apt update && apt upgrade -y
Step 2: Install Nginx
apt install nginx -y
systemctl enable nginx
systemctl start nginx
Open http://your-server-ip in a browser. The default Nginx welcome page confirms the installation is working.
Common Nginx commands:
| Task | Command |
|---|---|
| Start | systemctl start nginx |
| Stop | systemctl stop nginx |
| Reload config | systemctl reload nginx |
| Test config | nginx -t |
| View status | systemctl status nginx |
Step 3: Install MySQL
apt install mysql-server -y
systemctl enable mysql
systemctl start mysql
Harden the installation with the security wizard:
mysql_secure_installation
Set a strong root password, remove anonymous users, disable remote root login, and drop the test database when prompted.
Create a database and user for your application:
mysql -u root -p
CREATE DATABASE mysite;
CREATE USER 'siteuser'@'localhost' IDENTIFIED BY 'SecurePass456!';
GRANT ALL PRIVILEGES ON mysite.* TO 'siteuser'@'localhost';
FLUSH PRIVILEGES;
EXIT;
Step 4: Install PHP-FPM
Nginx does not process PHP natively — it passes requests to PHP-FPM (FastCGI Process Manager):
apt install php-fpm php-mysql php-cli php-curl php-gd php-mbstring php-xml php-zip -y
Check the installed version:
php -v
Note the version number (e.g., 8.3); you will reference it in your Nginx server block.
Step 5: Configure an Nginx Server Block
Create a configuration file for your domain:
nano /etc/nginx/sites-available/yourdomain.com
Paste the following, substituting your domain and PHP-FPM socket path (replace 8.3 with your actual PHP version):
server {
    listen 80;
    server_name yourdomain.com www.yourdomain.com;
    root /var/www/yourdomain;
    index index.php index.html;

    location / {
        try_files $uri $uri/ =404;
    }

    location ~ \.php$ {
        include snippets/fastcgi-php.conf;
        fastcgi_pass unix:/run/php/php8.3-fpm.sock;
    }

    location ~ /\.ht {
        deny all;
    }
}
Create the document root and enable the site:
mkdir -p /var/www/yourdomain
ln -s /etc/nginx/sites-available/yourdomain.com /etc/nginx/sites-enabled/
nginx -t
systemctl reload nginx
Step 6: Test PHP Processing
Create a test file:
echo "<?php phpinfo(); ?>" > /var/www/yourdomain/info.php
Visit http://yourdomain.com/info.php. Once you confirm PHP is working, delete the file:
rm /var/www/yourdomain/info.php
Step 7: Add a Free SSL Certificate
Install Certbot with the Nginx plugin:
apt install certbot python3-certbot-nginx -y
certbot --nginx -d yourdomain.com -d www.yourdomain.com
Certbot automatically updates your Nginx config to listen on port 443 and redirect HTTP to HTTPS. See the Installing a Free SSL Certificate with Certbot article for more detail.
Troubleshooting
- 502 Bad Gateway: PHP-FPM is not running. Check with
systemctl status php8.3-fpmand start it if needed. - 403 Forbidden: File permissions issue. Ensure the web root is readable:
chmod -R 755 /var/www/yourdomain. - Nginx config errors: Always run
nginx -tbefore reloading to catch syntax mistakes.
For help, reach CyclebreezeHost support anytime at info@cyclebreezehost.com or through the Client Area at https://clients.cyclebreezehost.com.