Setting Up WooCommerce
WooCommerce is the most widely used e-commerce plugin for WordPress, turning any site into a fully functional online store. This guide takes you from a fresh WordPress installation through your first live product.
Prerequisites
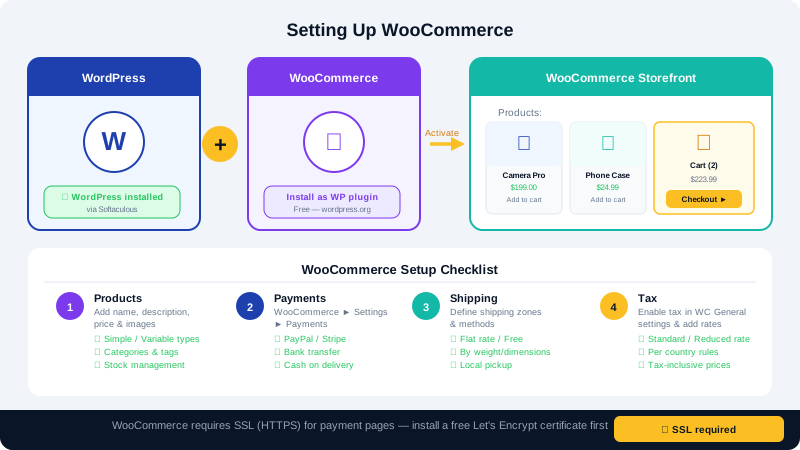
- An active CyclebreezeHost hosting account with WordPress installed (use Softaculous in cPanel for a one-click install).
- A valid SSL certificate — CyclebreezeHost provides free Let's Encrypt SSL via AutoSSL. Confirm your site loads on
https://before accepting any payments. - PHP 8.1 or higher (check and update in cPanel under Select PHP Version).
Step 1: Install WooCommerce
- Log in to your WordPress dashboard at
yourdomain.com/wp-admin. - Go to Plugins > Add New and search for WooCommerce.
- Click Install Now next to the official WooCommerce plugin, then click Activate.
- The WooCommerce Setup Wizard will launch automatically. Click Yes, let's go to begin.
Step 2: Complete the Setup Wizard
The wizard walks you through the essential settings:
- Store details — Enter your country, address, and product type (physical goods, digital downloads, or both).
- Industry — Select the category that best describes your business.
- Product types — Choose Physical products and/or Downloads as appropriate.
- Business details — Indicate whether you are currently selling anywhere else and your expected product count.
- Theme — Keep your existing theme or choose a WooCommerce-compatible one.
Click Continue after each section. The wizard installs recommended free extensions automatically.
Step 3: Configure Payments
- Go to WooCommerce > Settings > Payments.
- Enable the gateways appropriate for your customers:
- PayFast or Peach Payments are popular for South African stores.
- PayPal and Stripe work globally.
- Direct bank transfer (EFT) and Cash on delivery are built-in options that require no API setup.
- Click Set up on each gateway, enter your API credentials or account details, and save.
Step 4: Configure Shipping
- Go to WooCommerce > Settings > Shipping.
- Click Add shipping zone, name it (e.g., "South Africa"), and set the zone region.
- Click Add shipping method within the zone and choose from Flat rate, Free shipping, or Local pickup.
- Set your rates and save.
- Repeat for each geographic region you ship to.
Step 5: Add Your First Product
- Go to Products > Add New.
- Enter a Product name and full description in the main editor.
- In the Product data panel below, choose the product type: Simple product, Variable product, Grouped, or External/Affiliate.
- Set the Regular price (and Sale price if applicable).
- Under the Shipping tab, enter weight and dimensions for physical products.
- Add a Product image on the right-hand side and optionally add to a Product category.
- Click Publish.
Step 6: Install LiteSpeed Cache
CyclebreezeHost servers run LiteSpeed, and the LiteSpeed Cache plugin includes built-in WooCommerce compatibility for smart cache exclusions (cart, checkout, account pages).
- Go to Plugins > Add New, search for LiteSpeed Cache, install, and activate.
- Go to LiteSpeed Cache > Cache > WooCommerce and enable WooCommerce compatibility.
- This ensures cart and session pages are never cached while static pages benefit from full-page caching.
Recommended Next Steps
- Set up tax rates under WooCommerce > Settings > Tax.
- Configure email notifications under WooCommerce > Settings > Emails to customise order confirmations.
- Install WooCommerce Subscriptions or Bookings if your business model requires them.
- Enable JetBackup scheduled backups in cPanel — a store with live orders should be backed up daily.
Need Help?
If you run into any issues during setup, contact our support team 24/7 at clients.cyclebreezehost.com or email info@cyclebreezehost.com.