Speeding Up WordPress with Caching
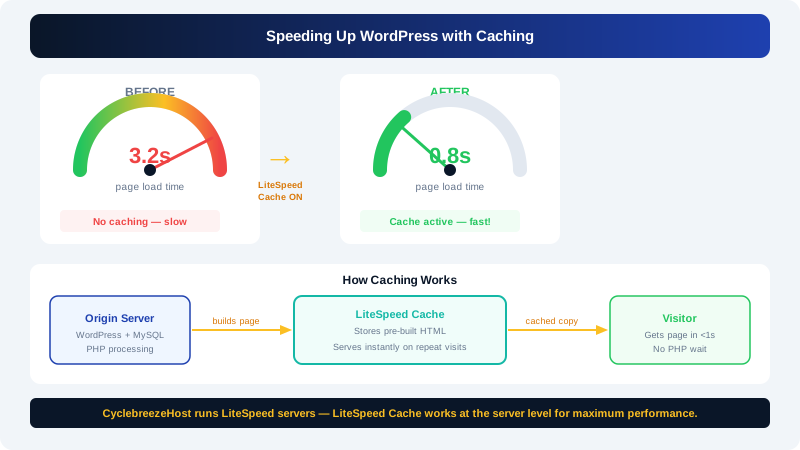
Page speed affects user experience, search engine rankings, and conversion rates. One of the most effective ways to speed up a WordPress site is caching — storing a pre-built version of each page so the server does not have to rebuild it from the database on every visit. CyclebreezeHost runs LiteSpeed web servers, which work directly with the LiteSpeed Cache plugin to deliver exceptionally fast response times.
What Is Caching?
When a visitor requests a page, WordPress normally queries the database, runs PHP, and assembles the HTML before sending it. Caching skips most of that process by serving a saved copy of the finished page instead. The result is dramatically faster load times and lower server resource usage.
Installing LiteSpeed Cache
The LiteSpeed Cache plugin is free, actively maintained, and designed specifically to work with LiteSpeed servers like those used on all CyclebreezeHost plans.
- Log in to
yourdomain.com/wp-admin. - Go to Plugins > Add New Plugin.
- Search for
LiteSpeed Cache. - Click Install Now, then Activate.
After activation, a LiteSpeed Cache menu item will appear in your left sidebar.
Basic Configuration
For most sites, the default settings work well. Run the setup wizard first:
- Click LiteSpeed Cache in the left menu.
- Click General Settings and ensure Enable LiteSpeed Cache is toggled On.
- Run the Setup Wizard if prompted — it applies safe defaults automatically.
Recommended Starting Settings
| Setting | Location | Recommended Value |
|---|---|---|
| Enable Cache | General > Cache | On |
| Cache Logged-in Users | General > Cache | Off (unless needed) |
| Browser Cache | Browser | On |
| CSS/JS Minify | Optimize > CSS/JS | On |
| Image Lazy Load | Media | On |
Page Cache
Page caching is enabled by default once the plugin is active. LiteSpeed Cache stores fully rendered HTML files and serves them directly from the server without invoking PHP or MySQL. You can verify it is working by checking the response headers for X-LiteSpeed-Cache: hit.
Object Cache
Object caching stores the results of database queries in memory so repeated queries do not re-run. To enable it:
- Go to LiteSpeed Cache > Advanced.
- Under Object Cache, set Object Cache to On.
- If your hosting plan includes Memcached or Redis, select it from the Method dropdown. Otherwise, the file-based fallback still provides a benefit.
Image Optimisation
Large, uncompressed images are one of the most common causes of slow WordPress sites.
- Go to LiteSpeed Cache > Image Optimization.
- Click Send Optimisation Request to submit your images to the LiteSpeed QUIC.cloud service for compression.
- Once processed, click Pull Optimised Images to replace originals with compressed versions.
The free tier of QUIC.cloud allows a set number of image optimisations per month.
Additional Speed Tips
- Use a lightweight theme. Themes packed with heavy sliders and scripts add significant page weight. Choose a theme built for performance.
- Limit active plugins. Each plugin adds PHP execution overhead. Audit your plugins regularly and remove any you are not using.
- Enable lazy loading for images. LiteSpeed Cache includes this under LiteSpeed Cache > Media > Lazy Load Images.
- Keep PHP up to date. Each major PHP version brings meaningful performance improvements. Check your PHP version under cPanel > MultiPHP Manager and upgrade if needed.
Clearing the Cache
After making changes to your site, clear the cache so visitors see the updated content.
- Go to LiteSpeed Cache > Dashboard.
- Click Flush All to clear the entire cache, or use the specific buttons to flush only pages, CSS/JS, or object cache.
You can also flush the cache from the WordPress admin toolbar — look for the LiteSpeed Cache icon at the top of the screen when you are browsing your site while logged in.
If you need help configuring caching or performance tuning, contact CyclebreezeHost support at info@cyclebreezehost.com — available 24/7.