Using phpMyAdmin to Manage Your Database
phpMyAdmin is a browser-based tool that lets you interact with MySQL databases without writing SQL from the command line. Through your CyclebreezeHost cPanel account, you can create tables, run queries, and move data in and out of your databases with a point-and-click interface.
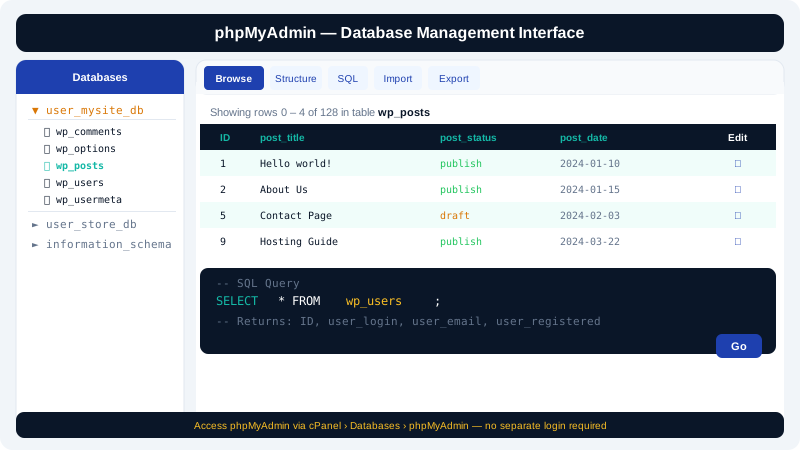
Accessing phpMyAdmin
- Log in to your cPanel account at
clients.cyclebreezehost.com. - Scroll to the Databases section and click phpMyAdmin.
- Your databases are listed in the left-hand panel. Click a database name to expand its tables.
If you have not yet created a database, go to MySQL Databases in cPanel first, create the database, create a user, and assign the user full privileges before returning to phpMyAdmin.
Browsing and Editing Data
- Select a database in the left panel, then click a table name.
- Click the Browse tab to view rows.
- Click the pencil icon next to any row to edit its values inline.
- Click Go to save changes.
To delete a row, check the checkbox beside it and click Delete at the bottom of the table.
Running SQL Queries
- Select your database in the left panel.
- Click the SQL tab at the top.
- Type or paste your query into the text area — for example:
SELECT * FROM wp_users WHERE user_email = 'you@example.com'; - Click Go. Results appear in a table below.
Use the Format button to auto-indent long queries before running them.
Creating and Dropping Tables
- Select your database, then click the Structure tab.
- To add a table, scroll to the Create table form at the bottom, enter a name and column count, and click Go.
- Fill in column names, data types, lengths, and attributes, then click Save.
- To remove a table, check the box next to its name in the structure list and choose Drop from the With selected dropdown. Confirm the prompt — this action is irreversible.
Importing a Database
- Select the target database in the left panel.
- Click the Import tab.
- Click Choose File and select your
.sqlor.sql.gzfile. - Leave the format set to SQL unless you are importing CSV or another format.
- Click Go. A success message appears when the import finishes.
Large imports (above 50 MB) may time out through the browser. For oversized files, use the SSH terminal or split the file into smaller chunks before importing.
Exporting a Database
- Select the database you want to back up.
- Click the Export tab.
- Choose Quick for a standard SQL dump or Custom to select specific tables, add
DROP TABLEstatements, or change the output format. - Click Go. Your browser downloads the
.sqlfile immediately.
Schedule regular exports or use JetBackup in cPanel for automated, restorable snapshots.
Common Tips
| Task | Where to find it |
|---|---|
| Reset a WordPress admin password | wp_users table → Edit row → set user_pass type to MD5 |
| Find table prefix | wp_options table → siteurl row |
| Check database size | Left panel — size shown below each database name |
| Repair a table | Operations tab → Table maintenance → Repair table |
If you encounter a database connection error on your site, verify that the database username and password in your application's config file (e.g., wp-config.php) match what is set under MySQL Databases in cPanel. For further help, open a support ticket at clients.cyclebreezehost.com and the CyclebreezeHost support team is available 24/7.